How to EPP (English Paper Piecing) Hexies
Hello, quilty friends! I’ve been making EPP hexagon flowers to use up my old 2.5" fabric scraps. A 1" hexagon template fits them perfectly, and I’m so happy with the results! I haven’t decided what to do with them yet, but I know they’ll make a lovely accent on my quilts.

Check out How to Organize Scrap Fabric in a Simple Way
In this post, I’ll share how I make hexie flowers using paper templates. There are many ways to make EPP hexagons, but this is the method that works best for me. I hope it makes your EPP process both efficient and fun!
Tools
Needle: I prefer to use applique needles, size 10, from Clover.
Thread: I like using a neutral 50 wt or 60 wt thread. I’ve tried 80 wt for better blending, but it broke too often.
Needle Threader: It is completely optional, but I highly recommend it if you enjoy hand stitching. It saves a lot of time.
Paper templates: I buy pre-cut paper templates from Amazon. I’ve also printed and cut my own at home with a paper cutter, but despite my efforts, they always came out slightly different in size.
Wonder clip: I use it to hold the edges together while stitching.
Thimbles: If you haven’t used one before, it might feel uncomfortable at first, but it really helps with stitching and protects your fingertips.
Scissors
Tweezers
Pins
Lots of fun and pretty fabric pieces!

Basting
I prefer glue basting. I found that it is faster and gives nice crisp edges.
First, glue the edges around the paper template to secure it on the fabric or simply pin it. Once it’s in place, cut the fabric around the template, leaving about a 1/4” seam allowance.


Next, glue along the other side of the template to secure the seam allowance. When gluing, place the glue just a hair below the edge—this makes it easier for the needle to pass through the fold without hitting glue residue.
Then, fold the fabric over the edge one side at a time. Be sure to fold all the pieces in the same direction for consistent seam allowance.


Piecing
It is the fun part—piecing!
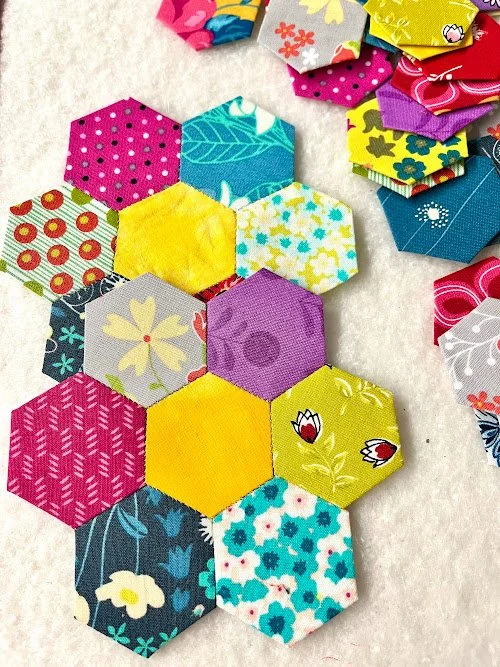
To make a flower, you need seven hexagon pieces. I love playing with colors and prints to make each flower unique. However, I like to use yellow in the center to create a consistent and organized look when working with scrap fabrics.

Once you lay out the flower, you need to plan your start and end points. It would be great to sew continuously without stopping, but since that’s not always possible, you need to choose stitching paths that work best for you. See the photo below to see how I mapped out my paths.

Now, you are ready to sew! Here are a few tips that I would like to share.
Make your thread about 10–12” long—just enough to sew 2–3 paths. Longer thread can get in the way and slow you down. Plus, a longer thread doesn’t mean more stitches; it’s more likely to fray and break as it passes through the edges.
Use a Wonder Clip to hold the pieces in place. It helps reduce stress on your hands and fingers.
Remember how I said to glue just a hair below the edge? With your needle, poke through the folded edges—you’ll feel a tiny tunnel-like space. That’s exactly how much fabric you need to grab for stitching.
Hide knots under the folded edge if possible.

Taking off the templates
Congratulations! You’ve finished a pretty hexie flower!
It’s time to remove the paper template and press the flower. Since we used a fabric glue stick, the paper should come off easily. If you used too much glue, place a damp cloth over the flower or use steam to soften it before removing.


EPP hexagon flowers are a great way to use up scrap fabrics and add a charming touch to your quilts. I hope these tips help make your EPP journey smoother and more enjoyable—happy stitching!