*Tutorial*DIY Scrappy Quilt Placemat
Welcome to my Scrappy Quilt Project No. 1! When I started brainstorming ways to use my unfavored or leftover fabric, I knew I wanted to make something practical—something I could use every day without worrying too much about it—rather than aiming for an artistic showpiece.
After looking around my house, the answer was obvious: new placemats! Honestly, the ones I’ve been using were made about eight years ago 😂, so it was definitely time for an upgrade.

***Also check out this scrap fabric-friendly block here. It’s free! —>Free Quilt Block Pattern-Sparkles
Scrappy Granny Square Block
For this project, I used a modified version of the Granny Square block. I have made a couple quilts using this block in the past. At that time, I used strips to connect the squares.

Quilts I pieced and longarm quilted for a friend and a client.
However, since I am using the precut scrap squares I made last week, I pieced one square at a time just like you would do a nine patch. Honestly though, there was not much difference as far as time goes. So, I think either way works fine.

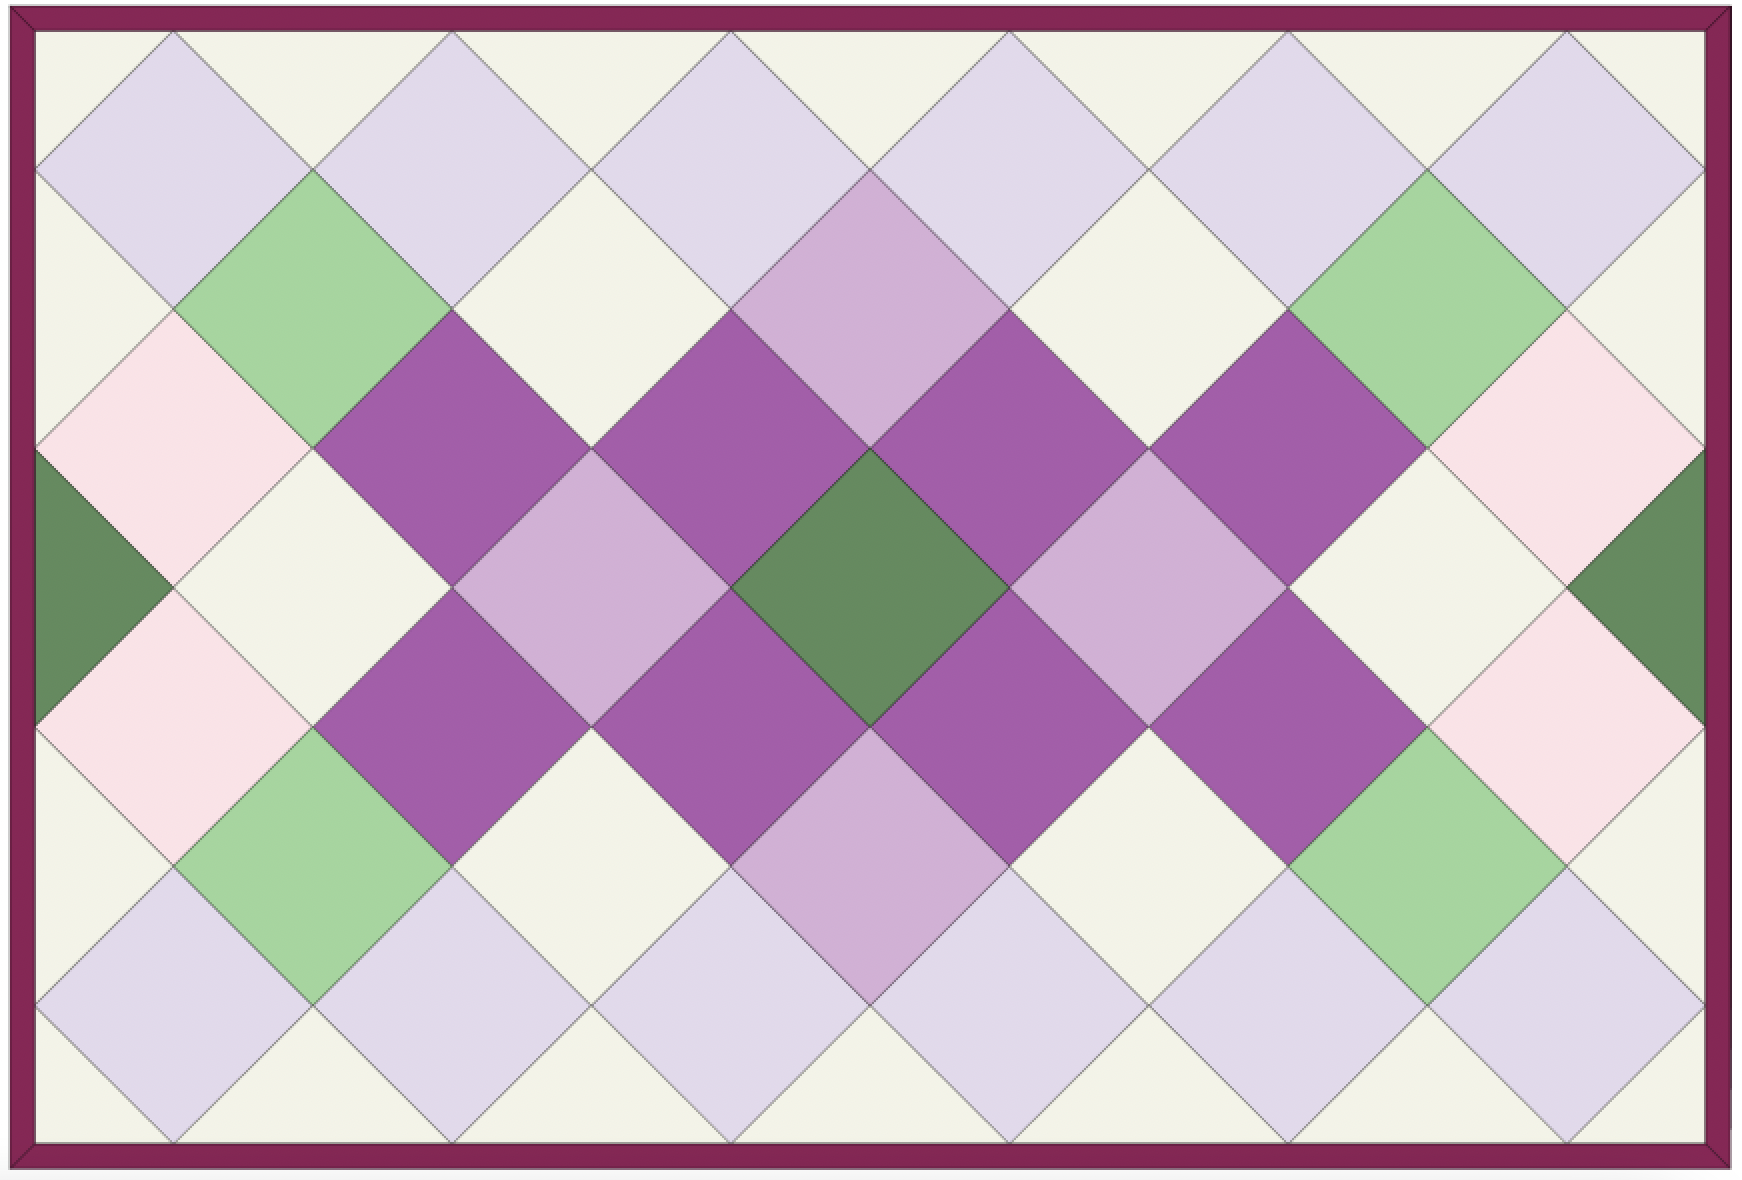
To create this layout, I used EQ8.
Materials
***The material list below is for one placaemat***
***All seam allowances are 1/4”
***Finished size: Apprx. 17” x 11 1/2”
(59) 2 1/2” Assorted Squares
Binding tape about 70” ( I used 2 1/2” tape)
(1) 22” x 16” for backing
(1) 20” x 13” for batting
I added a blank layout for “Color Your Own”.
Instructions
1. Make (3) strips with 9 squares, (2) strips with 7 squares, (2) strips with 5 squares, (2) strips with 3 squares. After this, you should have 2 squares left, which will be attached to each 3 square strips.

2. Layout the strips, and press seams toward to one direction alternating by each strip (or open seam).

Pressing Directions
3. Sew the strips together paying attention to the diagram. Square up the block trimming 1/4” away from the point.

4. Make a quilt sandwich with batting and backing, and quilt as you like. I simply used a walking foot.

5. Square up the quilt and bind it to finish. If you are new to binding, check out this post.


Color Your Own!
I hope you enjoyed making this small project!